Type text, add images, blackout confidential details, add comments, highlights and more.
02. Sign it in a few clicks
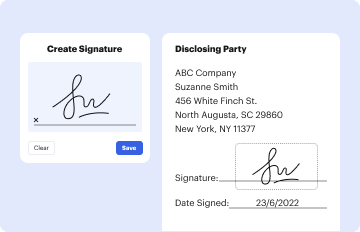
Draw your signature, type it, upload its image, or use your mobile device as a signature pad.
03. Share your form with others
Send it via email, link, or fax. You can also download it, export it or print it out.
How to use or fill out the SWPPP Template (Utah) Instructions DWQ has developed this with our platform
Ease of Setup
DocHub User Ratings on G2
Ease of Use
DocHub User Ratings on G2
Click ‘Get Form’ to open it in the editor.
Begin by inserting your project name and date at the top of the form. This sets the context for your SWPPP.
In Section 1, provide contact information for all responsible parties involved in storm water management. Ensure that each member's responsibilities are clearly defined.
Move to Section 2 and describe the nature of construction activities. Include estimates of disturbed areas and a brief description of major phases.
In Section 3, detail discharge information and identify receiving waters. Make sure to check if any waters are impaired or high quality.
Continue through each section, following instructions carefully. Customize sections as needed based on site-specific conditions.
Once completed, review all entries for accuracy and clarity before saving or sharing your document.
Start using our platform today to easily fill out your SWPPP Template for free!
Fill out : SWPPP Template (Utah)Instructions DWQ has developed this online It's free
See more : SWPPP Template (Utah)Instructions DWQ has developed this versions
We've got more versions of the : SWPPP Template (Utah)Instructions DWQ has developed this form. Select the right : SWPPP Template (Utah)Instructions DWQ has developed this version from the list and start editing it straight away!
There are many important factors that must be included in the development of an effective SWPPP, including site-specific potential pollutant sources, drainage scenarios, structural control devices and the identification of accountable pollution prevention team members.
What is one of the purposes of a SWPPP?
The purpose of the SWPPP is to control runoff from a construction site. The Qualified SWPPP Practitioner (QSP) is the person responsible for ensuring compliance with the SWPPP.
How to develop a SWPPP?
A SWPPP is a written document that identifies the industrial activities conducted at the site, including any structural control practices, which the industrial facility operator will implement to prevent pollutants from making their way into stormwater discharges.
What is SWPPP in Utah?
What is required by a construction stormwater permit? Your permit requires you to control and eliminate storm water pollution sources through the development and implementation of a Storm Water Pollution Prevention Plan (SWPPP).
What are common SWPPP mistakes?
One of the most common mistakes operators make is using a generic SWPPP template without tailoring it to the specific site conditions and state requirements. Every construction site has unique topography, soil composition, and water drainage patterns that must be accounted for in the plan.
Related Searches
Swppp template utah instructions dwq has developed this quiUtah SWPPP TemplateUtah SWPPP requirementsUPDES permitEPA SWPPP GuideUtah Construction General PermitUDOT SWPPPSWPPP stands for
Security and compliance
At DocHub, your data security is our priority. We follow HIPAA, SOC2, GDPR, and other standards, so you can work on your documents with confidence.
7 Steps of SWPPP Planning and Implementation Step 1: Perform a Worksite Assessment. Step 2: Develop a Site Plan. Step 3: Identify Sediment and Erosion Control BMPs. Step 4: Develop Training Procedures Proper BMPs. Step 5: Implement Good Housekeeping BMPs. Step 6: Conduct Frequent Inspections. Step 7: Stabilize the Area.
Related links
Stormwater Management Program
The University of Utah is a Small Municipal Separate Storm Sewer System (MS4) with a discharge permit that was issued by the Utah Division of Water Quality (DWQ)
DWQ has developed this Storm Water Pollution Prevention Plan (SWPPP) template for construction sites permitted under the Construction General Storm Water
Cookie consent notice
This site uses cookies to enhance site navigation and personalize your experience.
By using this site you agree to our use of cookies as described in our Privacy Notice.
You can modify your selections by visiting our Cookie and Advertising Notice.