Get the up-to-date kci wound vac form 2024 now

Get Form
kci wound vac form Preview on Page 1

Here's how it works

01. Edit your kci wound vac form printable online
01. Edit your vac therapy insurance authorization form online
Type text, add images, blackout confidential details, add comments, highlights and more.
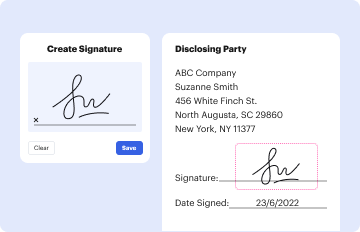
02. Sign it in a few clicks
Draw your signature, type it, upload its image, or use your mobile device as a signature pad.
03. Share your form with others
Send it via email, link, or fax. You can also download it, export it or print it out.

The best way to edit Kci wound vac form online

Form edit decoration
9.5
Ease of Setup
DocHub User Ratings on G2
9.0
Ease of Use
DocHub User Ratings on G2

With DocHub, making adjustments to your paperwork requires only a few simple clicks. Follow these fast steps to edit the PDF Kci wound vac form online for free:

  1. Sign up and log in to your account. Log in to the editor with your credentials or click Create free account to examine the tool’s features.
  2. Add the Kci wound vac form for redacting. Click on the New Document option above, then drag and drop the file to the upload area, import it from the cloud, or using a link.
  3. Adjust your document. Make any adjustments required: insert text and images to your Kci wound vac form, highlight information that matters, erase sections of content and substitute them with new ones, and add icons, checkmarks, and areas for filling out.
  4. Finish redacting the template. Save the updated document on your device, export it to the cloud, print it right from the editor, or share it with all the parties involved.

Our editor is super easy to use and effective. Try it out now!

be ready to get more

Complete this form in 5 minutes or less

Get form

Got questions?

We have answers to the most popular questions from our customers. If you can't find an answer to your question, please contact us.
Contact us
Fix the leaks by covering them with small strips of the transparent film dressing. When the leak is fixed, both the beep and YELLOW light will turn off. If the air leak is not resolved, the YELLOW light will come back on and the beep will start again; try again to re-seal the air leak.
For those who are wondering how long a wound vac needs to stay on, most healthcare professionals recommend changing the dressing every 48 to 72 hours or at least three times a week. If the wound is infected, it may require the dressing to be changed more often.
During typical usage, the battery may provide up to 14 hours of operation before needing to be recharged.
2:12 5:09 How to apply: 3M V.A.C. Dressings - YouTube YouTube Start of suggested clip End of suggested clip The. Skin gently place the foam into the wound cavity ensuring contact with all wound surfaces. DoMoreThe. Skin gently place the foam into the wound cavity ensuring contact with all wound surfaces. Do not force foam dressing into any area of the wound.
A KCI Wound Vac is a device that helps to heal wounds by using negative pressure to remove excess fluid and promote the growth of new tissue. It is often used in cases where traditional methods, such as bandages, have not been effective.
be ready to get more

Complete this form in 5 minutes or less

Get form

People also ask

KANSAS CERTIFICATE OF IMMUNIZATIONS (KCI) Page 1. KANSAS CERTIFICATE OF IMMUNIZATIONS (KCI) This record is part of the students permanent record and shall be transferred from one school to another as defined in Section 72-6262 (d) of the Kansas School Immunization Law (amended 1994.)
Do not keep the NPWT dressing on without suction for more than 2 hours, as this can cause infection. If you cannot get your dressing repaired or replaced within 2 hours, remove the entire dressing and place a gauze dressing over the wound.
The battery life for the WoundPro wound vac is approximately 36 hours.
It should take about 6 hours to fully charge the battery. Once fully charged the therapy unit will provide up to 14 hours of use.
4:04 5:29 3M ActiV.A.C. Therapy System Clinician Instructional Video YouTube Start of suggested clip End of suggested clip And close both clamps disconnect the dressing tubing from the canister tubing depress the canisterMoreAnd close both clamps disconnect the dressing tubing from the canister tubing depress the canister latch release on the side of the canister. And pull the canister.

Related links