
Print current view in PDF on LG mobile device
Aug 6th, 2022

0
forms filled out

0
forms signed

0
forms sent
01. Upload a document from your computer or cloud storage.
02. Add text, images, drawings, shapes, and more.
03. Sign your document online in a few clicks.
04. Send, export, fax, download, or print out your document.
How to print current view in PDF on LG with DocHub
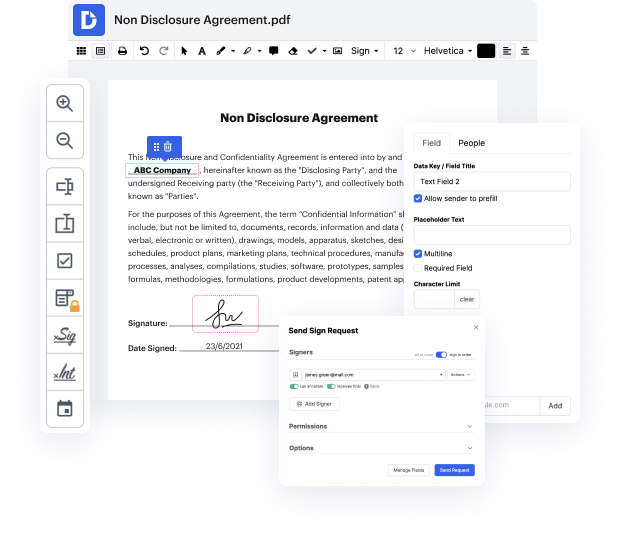
DocHub is an innovative platform that simplifies document management, allowing users to edit, sign, and share documents seamlessly. With its deep integration with Google Workspace, you can import and export documents directly from Google apps, making your online workflow more efficient. Whether you're using the LG Velvet, LG G6, LG V50 ThinQ 5G, or LG G8X ThinQ, this guide will help you print the current view in PDF effortlessly.
Follow the steps to print your document
- Open a web browser on your LG device and navigate to the DocHub website, then log in with your credentials.
- Once logged in, upload the document you wish to work on by selecting the appropriate option to import it from your device or Google Drive.
- After the document is loaded, navigate to the area you want to print. Adjust the view as needed to ensure everything is displayed correctly.
- Look for the print option available in the editor interface to access the print settings.
- Select 'Save as PDF' from the print options to ensure you are printing the current view in PDF format.
- Finally, choose the location on your LG device where you want to save the PDF, and confirm the action to download it.
Experience the convenience of document management with DocHub today and streamline your workflow for free!
PDF editing simplified with DocHub

Seamless PDF editing
Editing a PDF is as simple as working in a Word document. You can add text, drawings, highlights, and redact or annotate your document without affecting its quality. No rasterized text or removed fields. Use an online PDF editor to get your perfect document in minutes.

Smooth teamwork
Collaborate on documents with your team using a desktop or mobile device. Let others view, edit, comment on, and sign your documents online. You can also make your form public and share its URL anywhere.

Automatic saving
Every change you make in a document is automatically saved to the cloud and synchronized across all devices in real-time. No need to send new versions of a document or worry about losing information.

Google integrations
DocHub integrates with Google Workspace so you can import, edit, and sign your documents directly from your Gmail, Google Drive, and Dropbox. When finished, export documents to Google Drive or import your Google Address Book and share the document with your contacts.

Powerful PDF tools on your mobile device
Keep your work flowing even when you're away from your computer. DocHub works on mobile just as easily as it does on desktop. Edit, annotate, and sign documents from the convenience of your smartphone or tablet. No need to install the app.

Secure document sharing and storage
Instantly share, email, and fax documents in a secure and compliant way. Set a password, place your documents in encrypted folders, and enable recipient authentication to control who accesses your documents. When completed, keep your documents secure in the cloud.






Drive efficiency with the DocHub add-on for Google Workspace
Access documents and edit, sign, and share them straight from your favorite Google Apps.
Install now
Got questions?
Here are some common questions from our customers that may provide you with the answer you're looking for. If you can't find an answer to your question, please don't hesitate to reach out to us.
Contact us
How to print current date and time in PDF?
1:45 4:38 Add Date and Time Stamp to Each Page | PDF Image Printer 12 YouTube Start of suggested clip End of suggested clip Tab. Select add a date and time a text stamp. You can choose whether or not to include prefix orMoreTab. Select add a date and time a text stamp. You can choose whether or not to include prefix or suffix. Text by default the prefix.
How do I Print a PDF view?
Print a PDF Choose File Print or click icon in the toolbar. Select a Printer and number of Copies to print. (Optional) Click Properties to open the Printer properties. Under Pages to Print, select an option: Specify other options as per your requirements:
How do I Print the current date and time in a PDF?
1:45 4:38 Tab. Select add a date and time a text stamp. You can choose whether or not to include prefix orMoreTab. Select add a date and time a text stamp. You can choose whether or not to include prefix or suffix. Text by default the prefix.
How to put date and time when printing?
0:25 3:49 HOW TO Add Date and Time To Every Page When Printing - YouTube YouTube Start of suggested clip End of suggested clip You can customize the date and time format using the controls next to the date and time optionsMoreYou can customize the date and time format using the controls next to the date and time options select the desired. Position for the annotation. Then click on the ok button to save the changes.
How do I print a Web page as a PDF with date and time?
Just open docHub on a computer with Internet access and click file, create PDF, from web page. Enter the URL you want and after the status box closes, you will have a PDF complete with URL and date and time stamp at the bottom.
Why cant I Print current view?
If your current view of the document spans more than one page, the print current view feature will not be enabled because it involves a larger selection. If youre using two-page view mode, the option to print the current view will not be available; once again, it is the selection that disables the feature.
How to print a PDF with timestamp?
Stamp PDF Connect to the Internet and open the document in docHub Professional. Click the Tools menu. Select Sign docHub, then select Timestamp from the drop-down menu. Select a timestamp server from the list. Click Next. Click the Save button to save the document.
How to Print the current view only in a PDF?
One such feature is the print current view, which you can use by following the process shown here: Step 1: Open the file. You can do this by dragging the file into the software window or using the File ? Step 2: Make sure the printing content. Step 3: Click file. Step 4: Select Print Current View. Step 5: Settings.
See why our customers choose DocHub
Great solution for PDF docs with very little pre-knowledge required.

A Valuable Document Signer for Small Businesses.

I can create refillable copies for the templates that I select and then I can publish those.

Security and compliance
At DocHub, your data security is our priority. We follow HIPAA, SOC2, GDPR, and other standards, so you can work on your documents with confidence.
Learn more