Related links
Online Export Certificate System: Export Agent User Manual
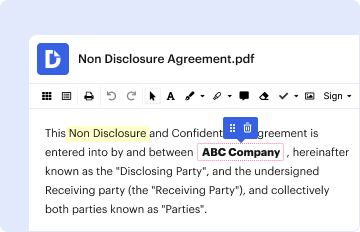
Apr 30, 2010 This screen is the entry point to the Export Certificates Application. The main window displays general Shellfish Program information. A smaller
Learn more
AquAculture MAnAgeMent guide
The manual also includes guidelines for environmental monitoring, evaluation and sampling of stocks, record-keeping procedures, and state- by-state contact
Learn more
Regulatory Procedures Manual, Chapter 7: Recall
7-1 PURPOSE. This chapter provides definitions, responsibilities, and procedures for agency components to initiate, review, classify, publish,
Learn more