Type text, add images, blackout confidential details, add comments, highlights and more.
02. Sign it in a few clicks
Draw your signature, type it, upload its image, or use your mobile device as a signature pad.
03. Share your form with others
Send repositioning chart via email, link, or fax. You can also download it, export it or print it out.
How to use or fill out skin inspection chart with our platform
Ease of Setup
DocHub User Ratings on G2
Ease of Use
DocHub User Ratings on G2
Click ‘Get Form’ to open the skin inspection chart in the editor.
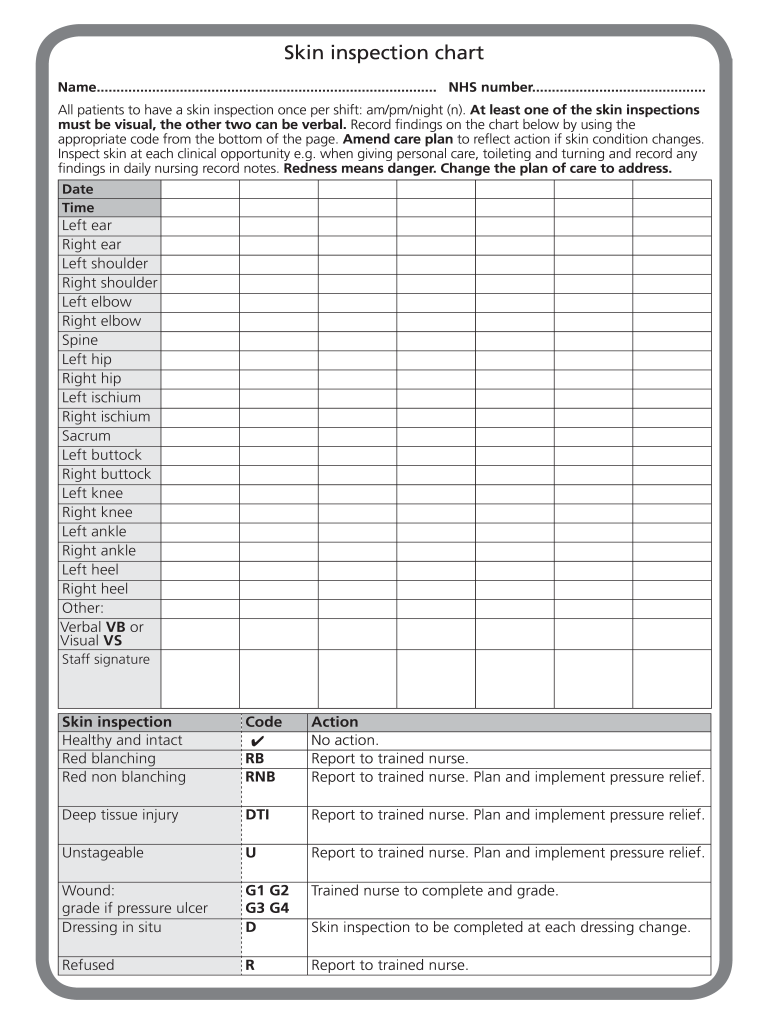
Begin by entering the patient's name and NHS number at the top of the form. This information is crucial for accurate record-keeping.
Record the date and time of the inspection. Ensure this is done for each shift: am, pm, or night.
Inspect each designated area (e.g., left ear, right shoulder) and mark findings using the appropriate codes provided at the bottom of the page. Use 'VB' for verbal inspections and 'VS' for visual inspections.
If any skin condition changes are noted, amend the care plan accordingly. For example, if redness is observed, change the plan of care to address it.
Finally, ensure that a staff signature is included at the end of the form to validate the inspection.
Start using our platform today to streamline your skin inspection process for free!
3.1.1 Hydraulic Flow Rates: Each hydraulic circuit for the harvester has a designated flow rate; approximate values are listed in the table below.Read more
Focused Assessment Integumentary System (Hair, Skin
Inspection: Inspect scalp for lesions; hair and scalp for presence of lice and/or nits. Inspect skin for lesions, bruising, and rashes. Inspect for pressureRead more
Cookie consent notice
This site uses cookies to enhance site navigation and personalize your experience.
By using this site you agree to our use of cookies as described in our Privacy Notice.
You can modify your selections by visiting our Cookie and Advertising Notice.