Create your Cash register Balance Sheet Template from scratch

Start Building Now
Title decoration

Here's how it works

01. Start with a blank Cash register Balance Sheet Template
Open the blank document in the editor, set the document view, and add extra pages if applicable.
02. Add and configure fillable fields
Use the top toolbar to insert fields like text and signature boxes, radio buttons, checkboxes, and more. Assign users to fields.
03. Distribute your form
Share your Cash register Balance Sheet Template in seconds via email or a link. You can also download it, export it, or print it out.

A detailed guide on how to build your Cash register Balance Sheet Template online

Form edit decoration

Step 1: Start with DocHub's free trial.

Navigate to the DocHub website and register for the free trial. This gives you access to every feature you’ll require to build your Cash register Balance Sheet Template with no upfront cost.

Step 2: Navigate to your dashboard.

Log in to your DocHub account and navigate to the dashboard.

Step 3: Initiate a new document.

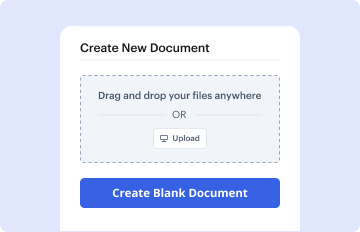
Hit New Document in your dashboard, and select Create Blank Document to craft your Cash register Balance Sheet Template from scratch.

Step 4: Utilize editing tools.

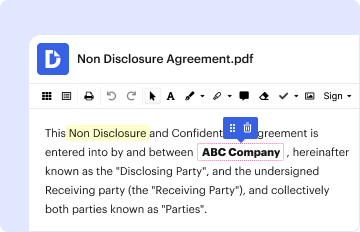
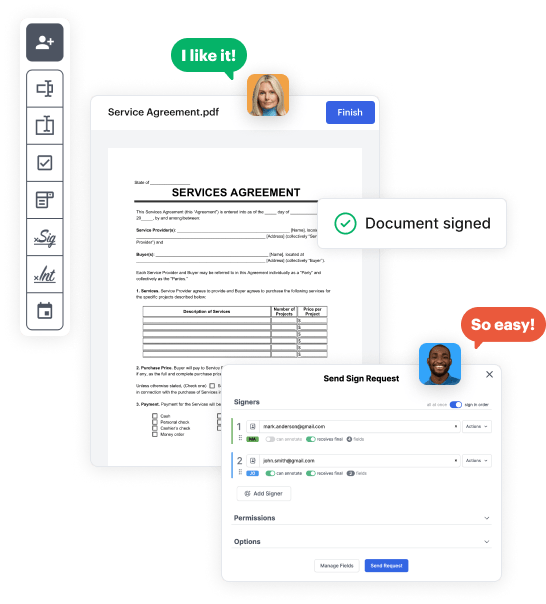
Place different fields such as text boxes, radio buttons, icons, signatures, etc. Organize these elements to match the layout of your document and assign them to recipients if needed.

Step 5: Modify the form layout.

Organize your document easily by adding, repositioning, removing, or merging pages with just a few clicks.

Step 6: Craft the Cash register Balance Sheet Template template.

Transform your newly crafted form into a template if you need to send multiple copies of the same document repeatedly.

Step 7: Save, export, or distribute the form.

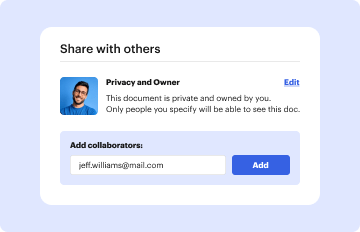
Send the form via email, distribute a public link, or even publish it online if you wish to collect responses from more recipients.

be ready to get more

Build your Cash register Balance Sheet Template in minutes

Start creating now

Got questions?

We have answers to the most popular questions from our customers. If you can't find an answer to your question, please contact us.
Contact us
Zettle. If youre looking for free cash register apps for all types of businesses, then Zettle is the right tool for you. With the app, you can accept payments, manage stocks and employees, and track sales.
Cash Register Requirements The ability to record the cashier identification name or number for each transaction. A cash register tape and a journal tape which record all transactions. A key which enables readings or totals of receipts-to-date to be taken during the business day.
The currency should be separated into slots by denomination, portrait side up, with all facing in the same direction. The highest denomination should always be on the left, decreasing to the smallest on the far right. Coins should follow the same pattern, with the highest on the left, decreasing to the right.
A cash register can probably cater to your needs! Depending on the complexity of your needs for a cash register, you can pay anywhere from $0 to $600 for a simple model, or upwards of $1,200 for a top-of-the-range Point-of-sale (POS) system.
Balancing a cash register is the method used to accurately account for all daily monetary transactions in a business. Good accounting and bookkeeping procedures begin with a balanced register. Typically, trustworthy employees who prove capable of exchanging cash in an efficient manner will operate the cash registers.
be ready to get more

Build your Cash register Balance Sheet Template in minutes

Start creating now

Related Q&A to Cash register Balance Sheet Template

Follow these steps to balance your cash drawers. Count drawer at the start of a shift. Get a sales report at end of a shift. Count physical cash. Reconcile any differences. Record cash drawer transactions. Return starting balance to drawer.
How to set up a cash register Step 1: Put your cash register in a suitable place. Step 2: the battery. Step 3: receipt paper rolls. Step 4: Unlock the drawer. Step 5: Turn on the cash register. Step 6: Configure your cash register. Step 7: Connect with other point of sale devices. Step 8: Close the drawer.

Additional resources on building your forms