


Comprehensive Overview of the Rental Property Walkthrough Checklist
Understanding the Rental Property Walkthrough Checklist
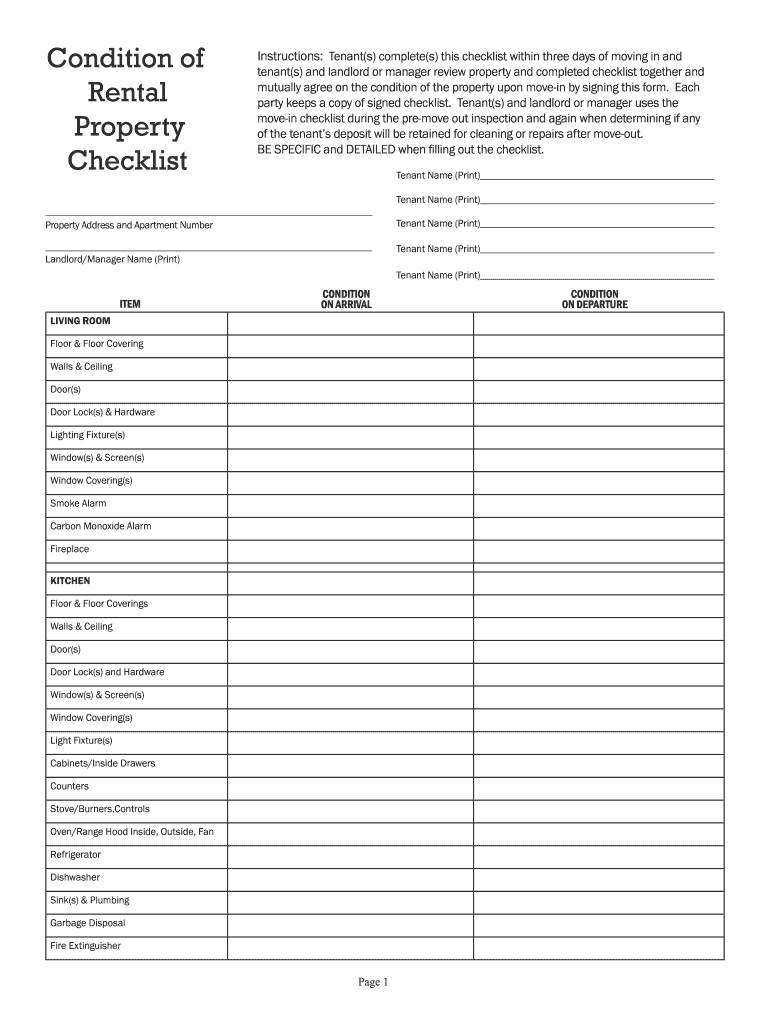
The rental property walkthrough checklist is a vital document designed to conduct a thorough inspection of a rental property before a tenant moves in. This checklist serves several key purposes, assuring that both the landlord and tenant have a mutual understanding of the property’s condition. The inspection typically occurs within three days of the tenant moving in, ensuring that any existing damage or issues are documented and agreed upon by both parties. This proactive approach helps in reducing disputes related to security deposits when the tenant moves out.
- Establishes a mutual agreement between landlords and tenants on the property's condition.
- Documents existing damages to aid in future disputes over security deposits.
- Allows both parties to note and agree on repairs needed before occupancy.
Key Components of the Walkthrough Checklist
The checklist usually includes several important sections that cover different areas of the rental property. Generally, a thorough inspection will look at specific items in each room, ensuring no detail is overlooked.
- Living Room: Inspect for damage to walls, flooring, windows, and appliances.
- Bedrooms: Check the condition of doors, closets, and flooring, noting any existing blemishes.
- Kitchen: Examine appliances for working order, and inspect cabinets, countertops, and plumbing.
- Bathrooms: Assess fixtures, tiles, and plumbing for any leaks or damages.
- Exterior: Look at the landscaping, pathways, and exteriors to evaluate their maintenance level.
Steps for Conducting the Walkthrough
To ensure a successful walkthrough, both parties should prepare accordingly and adhere to specific steps to facilitate the process.
- Schedule the Walkthrough: Agree on a date and time that works for both parties.
- Prepare the Checklist: Ensure both the landlord and tenant have a copy of the checklist for reference.
- Inspect Each Room: Go through each room, noting the condition of walls, floors, and fixtures.
- Document Findings: Use the checklist to mark off specific areas that are in good condition and note any concerns.
- Sign Off: Both parties should sign the completed checklist to formalize their agreement on property conditions.
Importance of Documenting Issues
When conducting the walkthrough, documenting existing damages or concerns is critical. This can prevent misunderstandings and disputes when the tenant vacates the property. Clear documentation may include:
- Digital Photographs: Taking pictures of any damage or areas needing attention.
- Written Descriptions: Notes on specific issues like stains, scratches, or non-functioning items.
- Signatures on the Checklist: Ensuring both parties agree on noted items prevents disputes after the tenant moves out.
Legal Considerations
Understanding the legal implications connected to the checklist is crucial for both landlords and tenants. The walkthrough checklist acts as a legal document that can be referenced in disputes regarding the condition of the property.
- Security Deposits: The checklist helps determine any deductions from security deposits for damages occurring during the tenancy.
- State Laws: Be aware of specific state laws surrounding property inspections and tenant rights. For example, some states may require landlords to provide written notice before conducting the walkthrough.
- Tenant’s Rights: Tenants should know their rights concerning the condition of the property and documentation standards.
Common Pitfalls to Avoid
When utilizing the rental property walkthrough checklist, both landlords and tenants should be cautious of common mistakes that can lead to disputes or oversight.
- Inadequate Inspection: Skipping areas of the property can lead to missed damages that later affect the security deposit.
- Poor Communication: Not discussing findings during the walkthrough can lead to misunderstandings or disagreements later.
- Failure to Document: Not keeping a record of the walkthrough can leave both parties without clarity on the property’s condition.
Practical Examples of Use
To illustrate the practical application of the rental property walkthrough checklist, consider the following scenarios:
- A tenant moves into an apartment with noted damage to the kitchen countertop; this is documented in the checklist, protecting the tenant from subsequent charges related to the damage when moving out.
- A landlord may find a broken window during the walkthrough that the previous tenant failed to report; this documentation allows the landlord to make timely repairs before the next tenant moves in.
Resources and Templates
Various resources are available to assist in creating or utilizing a rental property walkthrough checklist effectively.
- Printable Templates: Many websites offer free tenant move-in and move-out checklist PDFs for both landlords and tenants.
- Customizable Documents: Utilize word processing software to create personalized walkthrough checklists that cater to specific property features.
- Guides on State-Specific Regulations: Check local laws to ensure compliance with regulations surrounding landlord-tenant inspections and documentation practices.
This detailed overview of the rental property walkthrough checklist aims to elucidate its significance and practical application in rental agreements, thereby fostering a balanced relationship between landlords and tenants.