Type text, add images, blackout confidential details, add comments, highlights and more.
02. Sign it in a few clicks
Draw your signature, type it, upload its image, or use your mobile device as a signature pad.
03. Share your form with others
Send it via email, link, or fax. You can also download it, export it or print it out.
How to quickly redact Website Builder User Guide - Pixel Internet online
Ease of Setup
DocHub User Ratings on G2
Ease of Use
DocHub User Ratings on G2
Dochub is the greatest editor for updating your documents online. Adhere to this straightforward guide to edit Website Builder User Guide - Pixel Internet in PDF format online at no cost:
Register and log in. Register for a free account, set a secure password, and proceed with email verification to start managing your templates.
Upload a document. Click on New Document and choose the file importing option: upload Website Builder User Guide - Pixel Internet from your device, the cloud, or a protected link.
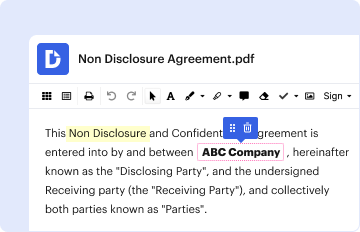
Make changes to the sample. Take advantage of the top and left-side panel tools to redact Website Builder User Guide - Pixel Internet. Add and customize text, images, and fillable fields, whiteout unneeded details, highlight the important ones, and comment on your updates.
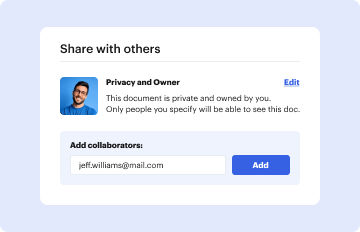
Get your paperwork done. Send the form to other individuals via email, create a link for quicker file sharing, export the sample to the cloud, or save it on your device in the current version or with Audit Trail added.
Try all the benefits of our editor today!
Fill out Website Builder User Guide - Pixel Internet online It's free
There are three basic ways to a Facebook Pixel code on your website: Use one of FBs many partner integrations (like WordPress, Wix, Shopify, Squarespace, etc). Manually enter the code on your site. Email your developer the code and instructions for installing.
How do I add tracking pixels to my website?
If you want to create a tracking pixel, follow these steps: Go to your advertising platform, such as Facebook. Go to the Ads Manager section. Click on the Pixels tab. Click Create a Pixel. Facebook then generates your pixel. Add your pixel to your WooCommerce site. Save your changes.
How do you integrate meta pixels on a website?
Add Meta Pixel to my website Go to your GoDaddy product page. Scroll down, expand Websites + Marketing and select Manage next to your site. Select Edit Website or Edit Site to open your website builder. In the right navigation panel, select Settings. Select Meta Pixel, and then enter the Pixel ID provided by Meta.
How to create a website pixel?
How to Pixels On Your Website Go to your Facebook Pixel tab in Ads Manager. Click Create a Pixel. Enter a name for your pixel. You can have only one pixel per ad account, choose a name that represents your business. Check the Accepts Terms of Use box. Generate your Pixel.
Related Searches
Website builder user guide pixel internet freeWebsite builder user guide pixel internet downloadHostinger pixel FacebookMeta Pixel HelperFacebook Pixel websiteZyro website builderHostinger website Builder pluginsFacebook Pixel tracking
Related links
Site Builder Toolkit Basics (v2.9)
Site Builder Toolkit 2.9 (SBT) is a completely browser-based web site content management solution created by SunGard. Higher Education. The simple and intuitive
Type the IP address (shown on the LCD Menu) into your web browser to access the Pixelator Web Interface. Throughout the Web Interface, helpful hints are
This site uses cookies to enhance site navigation and personalize your experience.
By using this site you agree to our use of cookies as described in our Privacy Notice.
You can modify your selections by visiting our Cookie and Advertising Notice.... Read more...Read less