Type text, add images, blackout confidential details, add comments, highlights and more.
02. Sign it in a few clicks
Draw your signature, type it, upload its image, or use your mobile device as a signature pad.
03. Share your form with others
Send it via email, link, or fax. You can also download it, export it or print it out.
How to use or fill out certificate decal with our platform
Ease of Setup
DocHub User Ratings on G2
Ease of Use
DocHub User Ratings on G2
Click ‘Get Form’ to open the certificate decal in the editor.
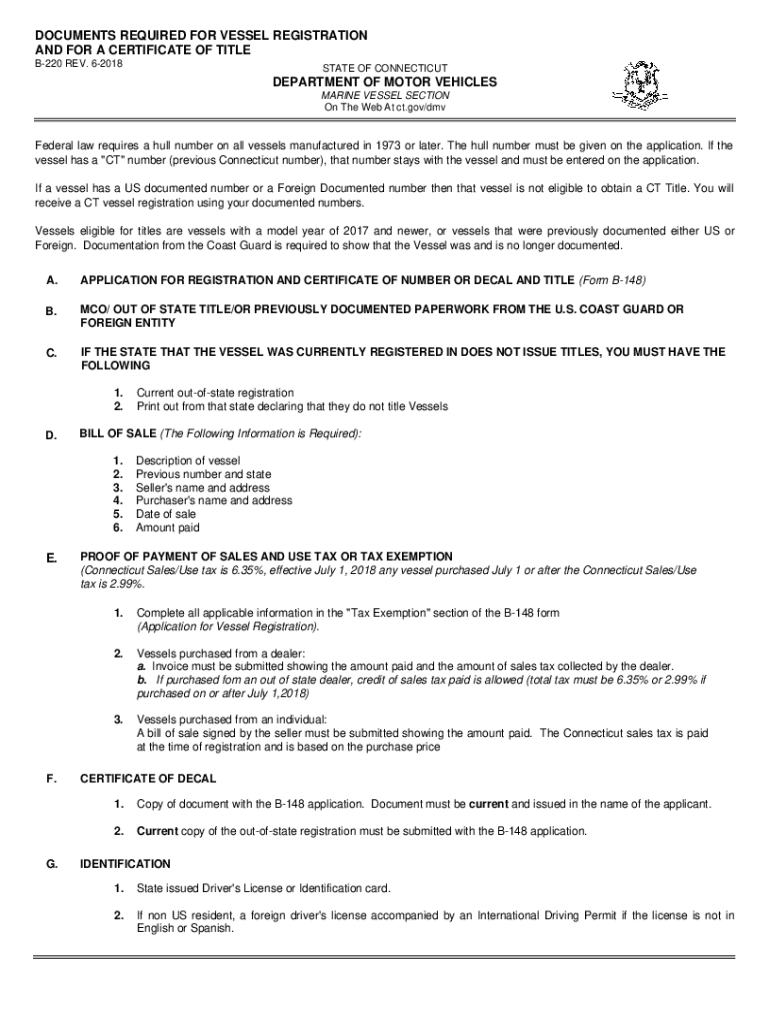
Begin by entering your vessel's hull number, which is mandatory for vessels manufactured in 1973 or later. If applicable, include any previous Connecticut registration number.
Fill out the 'Description of Vessel' section with details such as the model year and type of vessel. Ensure this information is accurate to avoid processing delays.
In the 'Bill of Sale' section, provide all required details including seller's and purchaser's names, addresses, date of sale, and amount paid. This documentation is crucial for tax purposes.
Complete the 'Tax Exemption' section if applicable. Include any necessary invoices or bills of sale that demonstrate sales tax payment or exemption.
Attach a current copy of your out-of-state registration and identification documents as specified in the form instructions.
Start using our platform today to streamline your certificate decal process for free!
Certificate decal templateCertificate decal customCertificate Seal StickersFree certificate seal templateCustom gold seal stickers for certificatesCertificate Seal stampCustom certificate SealsCustom gold foil stickers
Security and compliance
At DocHub, your data security is our priority. We follow HIPAA, SOC2, GDPR, and other standards, so you can work on your documents with confidence.
All VSCC employees and students must display a VSCC parking decal on their vehicles. Failure to display this decal may result in a citation and a fine.
Clean Air Vehicle Decals - California DMV - CA.gov
If you drive a vehicle that meets certain emissions standards and other criteria, you may be able to get Clean Air Vehicle (CAV) decals and a CAV decal
Cookie consent notice
This site uses cookies to enhance site navigation and personalize your experience.
By using this site you agree to our use of cookies as described in our Privacy Notice.
You can modify your selections by visiting our Cookie and Advertising Notice.