Create your Amazon purchase Order Form from scratch

Start Building Now
Title decoration

Here's how it works

01. Start with a blank Amazon purchase Order Form
Open the blank document in the editor, set the document view, and add extra pages if applicable.
02. Add and configure fillable fields
Use the top toolbar to insert fields like text and signature boxes, radio buttons, checkboxes, and more. Assign users to fields.
03. Distribute your form
Share your Amazon purchase Order Form in seconds via email or a link. You can also download it, export it, or print it out.

A quick guide on how to set up a polished Amazon purchase Order Form

Form edit decoration

Step 1: Log in to DocHub to begin creating your Amazon purchase Order Form.

First, sign in to your DocHub account. If you don't have one, you can simply register for free.

Step 2: Go to the dashboard.

Once logged in, head to your dashboard. This is your main hub for all document-focused processes.

Step 3: Launch new document creation.

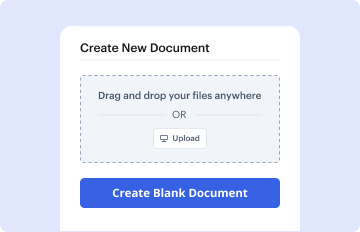
In your dashboard, choose New Document in the upper left corner. Pick Create Blank Document to put together the Amazon purchase Order Form from scratch.

Step 4: Insert form fillable areas.

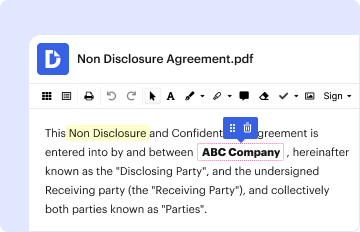
Place numerous fields like text boxes, photos, signature fields, and other elements to your form and assign these fields to intended recipients as necessary.

Step 5: Customize your template.

Customize your form by inserting directions or any other necessary details using the text feature.

Step 6: Review and correct the document.

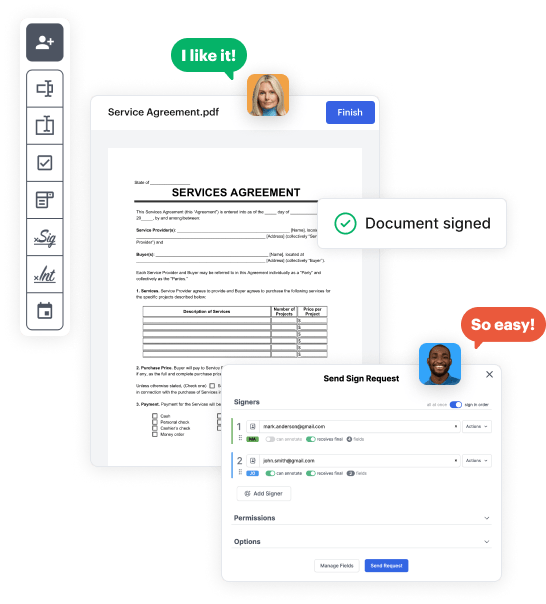
Thoroughly examine your created Amazon purchase Order Form for any discrepancies or essential adjustments. Leverage DocHub's editing capabilities to enhance your template.

Step 7: Send out or export the template.

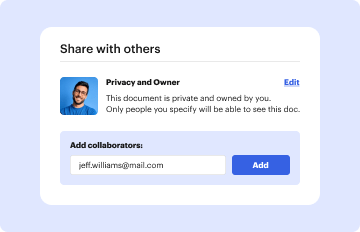
After completing, save your file. You can choose to keep it within DocHub, transfer it to various storage services, or send it via a link or email.

be ready to get more

Build your Amazon purchase Order Form in minutes

Start creating now

Got questions?

We have answers to the most popular questions from our customers. If you can't find an answer to your question, please contact us.
Contact us
Go to Business Settings. Select Business order info. Enable (PO) Number, and select required if you require a PO number at checkout. Select Save.
To add a purchase order Sign in to the AWS Management Console and open the AWS Billing and Cost Management console at . In the navigation pane, choose Purchase orders. Choose Add purchase order. For Purchase order ID, enter a unique identifier for your purchase order ID.
Heres a breakdown of the typical purchase order form format: Header. Buyer and seller details, addresses, contacts, and a unique PO number. Date and delivery. Issue date and expected delivery date. Itemized list. Payment terms. Shipping/billing. Signatures. Logo and branding.
Heres what information should appear on the average purchase order you send a vendor or receive as a vendor yourself: Buyer Information. Vendor Information. PO date. Purchase order number (PO number) Description of goods or services. Quantity and price. Delivery information. Payment terms.
Here are the most common purchase order process steps: Create a purchase order. Send out multiple requests for quotation(RFQ) Analyze and select a vendor. Negotiate contract and send PO. Receive goods/services. Receive and check invoice (3-Way Matching) Authorize invoice and pay the vendor. Record keeping.
be ready to get more

Build your Amazon purchase Order Form in minutes

Start creating now

Related Q&A to Amazon purchase Order Form

AWS Purchase Order Management is a service that allows you to easily manage your AWS purchase orders (POs) in a self-service manner. Centralize the management of multiple POs, reduce overhead costs in matching invoices with POs, and increase the accuracy and efficiency in your procure-to-pay process.
Open the AWS Billing and Cost Management console at . In the navigation pane, choose Purchase orders. Choose the purchase order you want to edit. In the Line items section, choose Edit. Change the line item information as needed. Choose Save line item.

Additional resources on building your forms