Obtén todo lo necesario para completar y certificar SCREEN PAINTER - La WEB de programacion Abap 4 - abap 2025 ahora

Obtener impreso
SCREEN PAINTER - La WEB de programacion Abap 4 - abap Vista previa en la página 1

Así es como funciona

01. Edita el impreso online
Escribe texto, añade imágenes, oculta detalles privados, añade comentarios, resalta y más.
02. Firma en pocos clics
Dibuja tu firma, escríbela, sube su imagen o utiliza tu dispositivo móvil como tableta de firma.
03. Comparte tu impreso con otros
Envíalo por correo electrónico, enlace o fax. O lo puedes descargar, exportar o imprimir.

Una guía rápida sobre cómo editar y firmar SCREEN PAINTER - La WEB de programacion Abap 4 - abap en línea

Form edit decoration
9.5
Fácil configuración
Valoración de DocHub en G2
9.0
Fácil uso
Valoración de DocHub en G2

Si estás completando documentos con bolígrafo y papel y entregando copias impresas, estás atrasado. Es ineficiente: cada error que cometes significa que debes imprimirlo de nuevo y volver a llenarlo desde el principio. Prueba DocHub, un servicio sólido y confiable de modificación de documentos que te permitirá preparar cualquier trámite con el mínimo tiempo y esfuerzo.

Sigue los pasos a continuación para llenar y editar SCREEN PAINTER - La WEB de programacion Abap 4 - abap:

  1. Haz clic en el botón "Obtener formulario" para abrir y comenzar a trabajar en tu PDF en nuestro editor.
  2. Haz clic en el primer campo en blanco e introduce tu texto o coloca marcas cruzadas para proporcionar la información requerida.
  3. Utiliza nuestra navegación de plantillas incorporada para avanzar al siguiente campo y no saltarte nada.
  4. Edita tu plantilla agregando imágenes o dibujando símbolos, líneas o formas donde sea necesario.
  5. Elimina el texto innecesario, censura los detalles sensibles y resalta los más importantes.
  6. Revisa tu PDF y verifica si hay algo más que debas llenar o cambiar.

Y así es cómo puedes firmar y enviar rápidamente tu SCREEN PAINTER - La WEB de programacion Abap 4 - abap para la firma:

  1. Haz clic en la herramienta Fecha y coloca el campo junto a las áreas de tu firma para escribir la fecha en que tus firmantes aprobaron el trámite.
  2. Firma tu documento utilizando el botón correspondiente en la barra de herramientas superior y colócalo en el área donde deseas que esté.
  3. Crea tu firma electrónica agregando su imagen real, dibujándola o escribiendo y estilizando tu nombre completo.
  4. Envía tu trámite completo para la firma electrónica: crea solicitudes de firma o compártelo por correo electrónico.

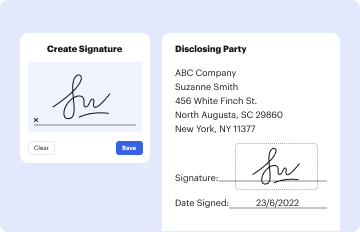
Obtén tu SCREEN PAINTER - La WEB de programacion Abap 4 - abap cumplido y firmado rápidamente con firmas electrónicas legalmente vinculantes en minutos en lugar de horas o días con DocHub. ¡Pruebalo hoy!

preparate para conseguir más

Rellena este impreso en 5 minutos o menos

Obtener impreso

¿Tienes alguna pregunta?

Tenemos respuestas a las preguntas más frecuentes de nuestros clientes. Si no encuentras respuesta a tu pregunta, ponte en contacto con nosotros.
Contacto
Finding the Transaction Code for the Task You Want to Start Choose Extras Settings Show technical name. After refreshing the menu, the system displays the transaction codes of all items from the menu.
To start the Screen Painter, choose the corresponding pushbutton on the initial screen of the ABAP Workbench or enter Transaction SE51 .
Lets say you want to create a primary screen to collect a customers name and address: Start SE51: Enter transaction code SE51 in your SAP system. Create a Program and Screen: Provide a program name (e.g., ZCUSTOMERDATA) and a screen number (e.g., 100). Layout Design:
Creating a Screen Start the Object Navigator (transaction SE80) and navigate to the program for which you want to create a screen. In the Screen Number field, enter a screen number. Choose Create. Define the screen attributes. For more information, see Maintaining Screen Attributes. Save and activate the screen.
The Screen Painter is a tool in the ABAP Workbench that you use to create screens for ABAP programs and flow logic for the screens. Integration. The Screen Painter can be used with the Modification Assistant.
preparate para conseguir más

Rellena este impreso en 5 minutos o menos

Obtener impreso

La gente también pregunta

You can also use Ctrl + Alt + C to take a screenshot. Using your cursor, drag around the area you want to capture. Rename your screenshot. Draw a rectangular shape around the area you want to highlight.
With the Screen Painter in change mode, choose the table control icon from the element palette. The mouse pointer changes its shape. Drag and drop the object onto the screen work area. Resize or reposition the table control if necessary. Assign an element name to the new table control.
Enter the name of the screen fields that are to be assigned to the field group. Besides input fields, you also need to specify the field names of help texts, work fields, etc. For each field, specify whether it is ready for input or not. Naming convention: Values from 1 to 1750 are permitted for field groups.

Enlaces Relacionados